Introduction to Hot Water System Drain Valves
Drain valves are essential for the upkeep of hot water systems. Located at the bottom of a water heater tank, the water heater drain valve allows you to drain the tank of sediment and minerals that can accumulate over time. Draining the water heater is key to maximizing its efficiency and extending its lifespan.
Common drain valve problems include leaks, blockages from sediment, and operational difficulties. Such issues can cause inefficient drainage and early deterioration of components.
Leaky valves waste water and energy, potentially compromising system efficiency. Moreover, sediment accumulation can corrode the tank internally.
Promptly addressing drain valve issues is crucial.
Minor issues can quickly escalate into bigger problems that lead to complete system failure, no hot water working, and costly repairs. This guide provides an overview of hot water system drainage, common issues, and remedial steps.
Locating the Drain Valve on Your Hot Water System
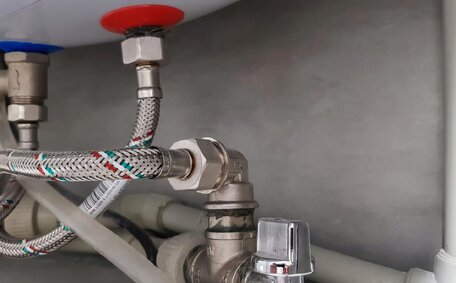
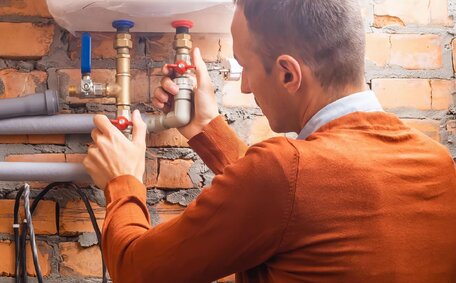
Locating your system’s drain valve is the initial step in maintenance or troubleshooting. The heater drain valve is typically located near the bottom of the tank.
Gas and Electric Hot Water Systems
For tank-based gas and electric systems, the drain valve is often near the bottom, close to the cold water inlet, resembling an outdoor tap and may be brass or plastic.
Tankless Water Heaters
Tankless systems use a drain plug, typically located at the heat exchanger or base, which unscrews easily. Consult manuals as locations vary by model.
Ensure you switch off power at the circuit breaker before draining and position a bucket under the drain to catch water.
Wait for the system components to cool down fully to avoid the risk of burns.
If you’re unsure about water coming from your drain or can’t access it safely, contact a professional plumber to assist.
Identifying a Faulty or Leaking Drain Valve
There are a few key signs of a faulty or leaking drain valve to watch out for:
- Water leaking from the valve or area around the valve
- Corrosion or mineral deposits around the valve
- Inability to open or close the valve
- The valve handle spins freely without engaging the opening/closing mechanism
A leaking drain valve typically results in a steady drip of water. You may see moisture, drips, or puddling under the water heater when this happens. Leaks can cause worn valve components and also risk sediment buildup in the system.
Corrosion and mineral deposits also signal issues. As water leaks past the valve, it leaves behind sediment that cakes around the opening. This can prevent the valve from sealing fully or operating smoothly.
A stuck valve or one that spins without engaging signifies that its internal components are likely damaged or excessively corroded.
Immediate replacement of faulty drain valves is necessary. Leaks might indicate excessively high temperatures, causing energy loss, cost increase, risk of flooding, and sediment buildup which diminishes hot water supply. Replacing valves proactively helps avoid severe future issues.
When To Replace a Faulty Drain Valve
There are a few situations that call for replacing your hot water system’s drain valve:
- The valve is leaking substantially and cannot seal completely, despite gasket repairs or tightening
- Sediment buildup is extensive, impacting water flow and unable to be flushed out
- Components are very corroded or damaged
- The valve is original to an older system, around 8-12 years old
Choose a durable brass or appropriate plastic valve for replacement, typically sized 20mm or 25mm for home systems.
Choose a valve compatible with your system’s make and model to maintain efficiency; an upgraded high-flow valve may enhance drainage.
Many homeowners are capable of replacing a drain valve. Always check for leaks before resuming use of the system.
Before installing the new valve, turn off power and gas, and ensure plumber’s tape is used on the threads for a secure fit.
For more complex alterations like pipe fittings, enlist a professional plumber to ensure compatibility and optimal functioning.
Step-By-Step Drain Valve Replacement
Many homeowners can undertake the replacement of a faulty or leaking drain valve as a crucial maintenance task. Here is a step-by-step guide to replacing a standard 3⁄4 inch drain valve:
- Turn off power and gas supply to water heater, ensuring the pilot light goes out. Allow system to fully cool.
- Place bucket under valve to catch water when opened.
- Use adjustable wrench to disconnect old valve. Unscrew counter-clockwise.
- Remove old plumber’s tape and sediment around threads with rag.
- Apply new plumber’s tape to threads on new valve.
- Hand tighten new valve into place, then use wrench for 1⁄4 turn.
- Slowly open new valve to flush sediment until water runs clear.
- Close valve and check for leaks at threads or valve body.
- Restore power and gas to system once the valve is leak-free and pilot light goes out.
Consult the system’s manual for specific draining and valve replacement instructions and opt for solid brass or plastic valves suited for both electric and gas heaters.
Avoid galvanised steel valves, which are prone to faster corrosion.
Cleaning and Maintaining Drain Valves
Consistent cleaning and maintenance of the drain valve are vital for optimal performance and the longevity of your hot water. Simple tasks conducted one to two times per year can prevent issues arising.
Draining the Tank
Flush the tank annually to remove sediment and mineral deposits that, if accumulated, reduce heating efficiency.
Open the valve slowly and allow water to empty, ensuring water flowing through is clear before finishing. Switch off power and gas, then place bucket beneath the valve.
Inspecting the Valve & Connections
When draining, check the threads, seals, and valve body for signs of leaks or corrosion.
If necessary, tighten the fittings or replace worn gaskets to address leaks. Consider replacing brass valves if they exhibit significant corrosion.
Replacement Interval
Replace drain valves every 5-8 years to forestall emergency problems. Upgraded valvesinstalled by a professional plumber improve drainage flow and reliability.
Consistent drain valve care ensures optimal hot water tank health. Contact a plumber if you have concerns inspecting or maintaining the valve yourself.
Preventing Future Drain Valve Issues
To prevent recurring drain valve problems, proper maintenance and shut off responses are critical when issues arise. Conduct annual drain valve and pipe inspections to check for leaks, corrosion and sediment buildup.
Address any leaks promptly by securing fittings or swapping out degraded gaskets where essential.
Attend to even minor leaks right away before they worsen and cause water damage or corrosion. Wrap pipes with insulating foam to prevent leaks from freezing temperatures. Use a water softener if you have hard water, reducing mineral scale that can impede drainage.
When draining the tank, always flush the system completely until water runs clear. Check your system regularly as sediment accumulation reduces heating capacity over time. Drain valves made of durable brass or plastic last significantly longer than galvanised steel.
If components become highly corroded or connections require adjustment, hire a professional plumber to ensure compatibility and functionality. Proper use and consistent maintenance of drain valves prevents many larger issues down the road.
Safety Tips for Drain Valve Maintenance
Safety is paramount when performing maintenance on your system’s drain valve. Neglecting safety precautions can result in serious injuries from burns. Here are some key safety tips:
- Always switch off the power supply and gas supplies to the hot water system before draining water or accessing the valve area.
- Wait for the tank water to cool completely before starting work, confirming the light has gone off. The water heating element inside the tank can make water extremely hot, posing severe scald risks.
- Wear rubber gloves and eye protection when operating the drain valve to avoid skin contact with hot water and sediment.
- Use tools with insulated handles if adjusting pipe fittings to protect against hot surfaces.
- Check valve outlets are clear of items before opening to prevent water damage from drainage flow.
- Place a bucket or hose beneath the outlet to safely direct water into a drain area.
- Keep your body clear of the immediate valve opening zone when activating the release lever or switch.
- If uncertain of drain valve locations or unable to fully power off the system, call a professional for assistance.
Exercising caution protects your safety and avoids accidents when maintaining hot water systems. Never compromise established precautions for the sake of expediency.
When to Call a Professional Plumber
While homeowners can perform basic drain valve maintenance, certain situations require a professional plumber’s skills:
- You have a gas water hot water system – Your gas water hot water system carries risk of fire or carbon monoxide poisoning if incorrectly handled. Allow qualified gas fitters to service them.
- Valve replacement requires pipe refitting – If replacing the valve entails altering pipe configurations, a professional should ensure correct fittings and connections to avoid leaks.
- Sediment buildup is excessive – Professionals have high-power flushing equipment to thoroughly clear heavy sediment and scale from tanks and pipes.
- Any signs of water or gas leaks – Don’t overlook leaks. Professionals pinpoint their origins and safely address them.
- The valve attachment point is corroded – Severe corrosion may require pipe section replacement best left to professionals.
- DIY efforts have failed – If you’ve attempted self-fixes that haven’t resolved the issues, avoid further complications by hiring a trusted local plumber like North Epping Plumbing on 1300 349 338.
Our licenced North Epping plumbers have extensive experience tackling all your water heater drain valve problems. For reliable solutions covered by quality guarantees, email us or call anytime to book an appointment.


